Normal Map Photography
a tutorial by Ryan Clark
Introduction
As graphics technology advances, the game artist's job becomes increasingly difficult. Modern game engines demand detailed normal maps, which can be labor-intensive to create. In this tutorial, I present a new method whereby an artist can create these maps in minutes rather than hours.
If you find this method helpful, or if you have a suggestion, let me know at richardryanclark@gmail.com.
Kind souls have translated this tutorial into Czech and Japanese. Further translations are always welcome!
Materials
Before beginning this tutorial, you will need the following items:
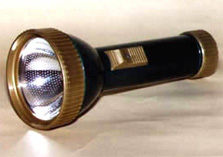
- Digital camera, preferably with a tripod.
- Computer with Adobe Photoshop, or a similar image editor.
- Movable light-source.
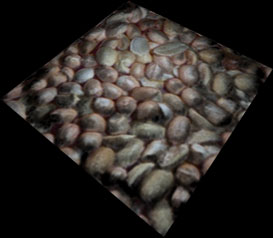
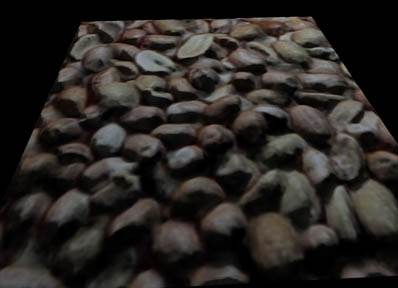
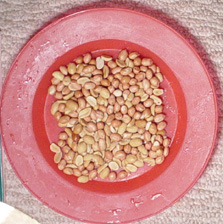
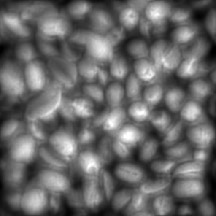
- Subject. (In this example, Subject is a bowl of peanuts.)
 |
 |
 |
 |
Camera
|
Computer
|
Light-Source
|
Subject
|
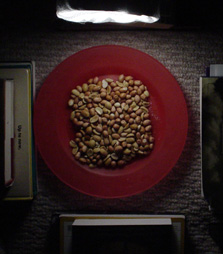
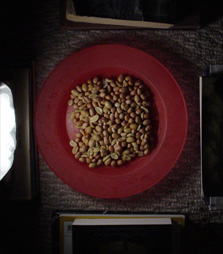
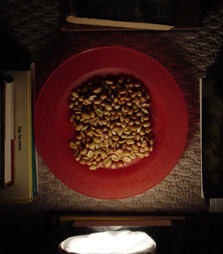
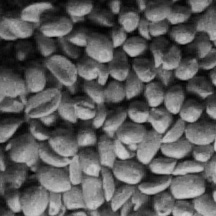
Step 1:
Place your camera in a fixed position, and photograph your
subject four times, lighted from each of four cardinal directions, as in the examples below.
You may want to experiment with the elevation of your light. The subject should be lighted from a low angle, but not so low that it's obscured by its own shadow.
 |
 |
 |
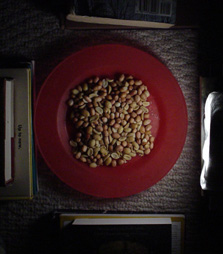 |
| lighted
from above |
lighted
from the left |
lighted
from below
|
lighted
from the right
|
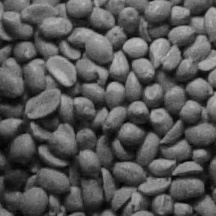
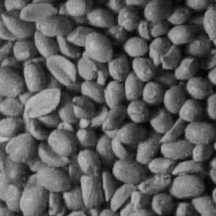
Step 2:
Convert your photographs to grayscale, and crop them as desired.
 |
 |
 |
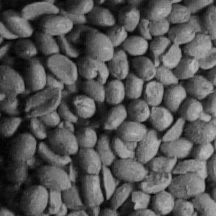 |
| lighted
from above |
lighted
from the left
|
lighted
from below
|
lighted
from the right
|
Step 3:
Create a new image, using your above-lighted photograph for a green
channel, and your left-lighted photograph for a red channel.
This image will be hereafter called "Above&Left."
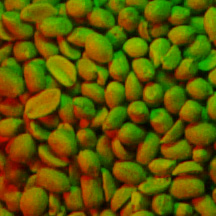 |
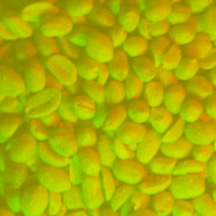
Above&Left
green channel = lighted from above
red channel = lighted from the left
|
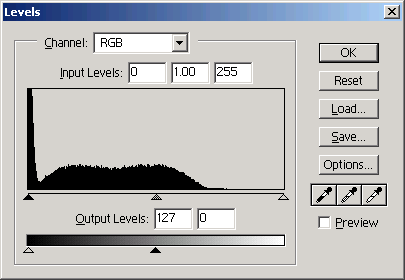
Step 4:
Open the levels dialog for "Above&Left."
Choose output levels 127 and 0, and then click OK.
 |
Above&Left:
after levels adjusted
|
Step 5:
Create a new image, using your below-lighted photograph for a green
channel, and your right-lighted photograph for a red channel
This image will be hereafter called "Below&Right"
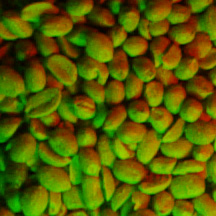 |
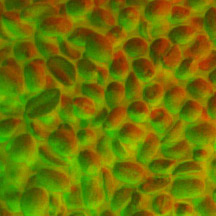
Below&Right
green channel = lighted from below
red channel = lighted from the right
|
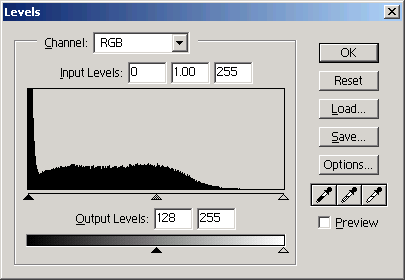
Step 6:
Open the levels dialog for "Below&Right."
Choose output levels 128 and 255, and then click OK.
 |
Below&Right:
after levels adjusted
|
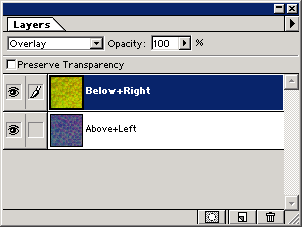
Step
7:
Paste Below&Right into a new layer over
Above&Left.
Set the top layer's blend mode to "Overlay," and then flatten your
image.
 |
Normal Map:
after image overlay
|
Step
8:
Fill your blue channel with a light color. You may want to experiment with the shade; a lighter blue will yield a smoother normal map.
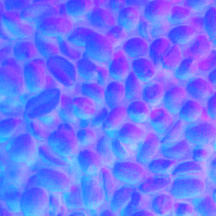 |
Normal Map:
blue channel lightened
|
At this point, your normal map should be finished and ready for use.
Step
9: (optional)
If your game engine supports parallax mapping, you can use
CrazyBump to create the necessary heightmap.
 |
Displacement Map:
from CrazyBump
|
Further Examples:
 |
 |
 |
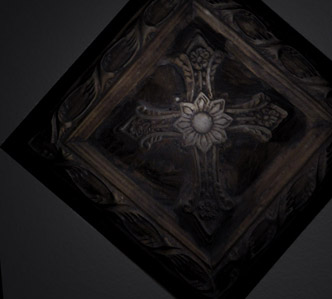
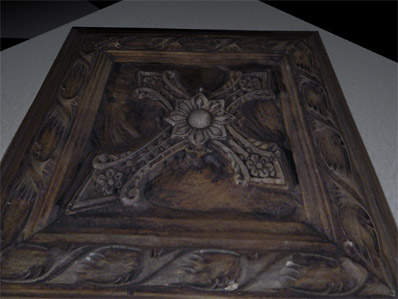
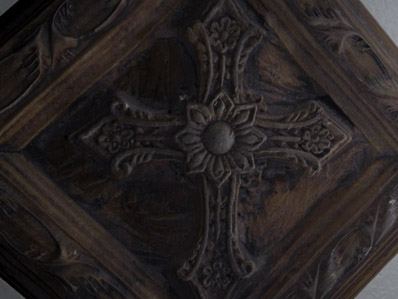
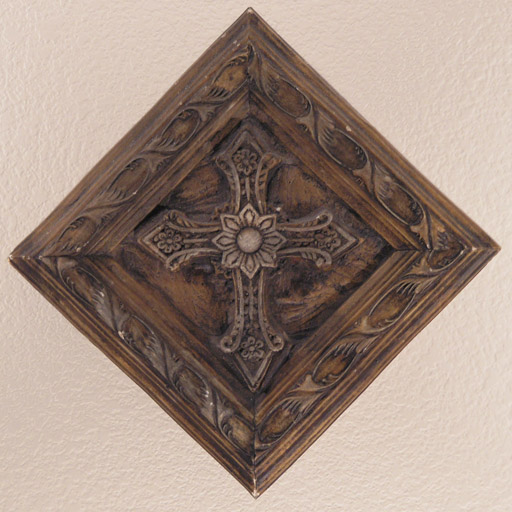
Subject:
Decorative Cross
|
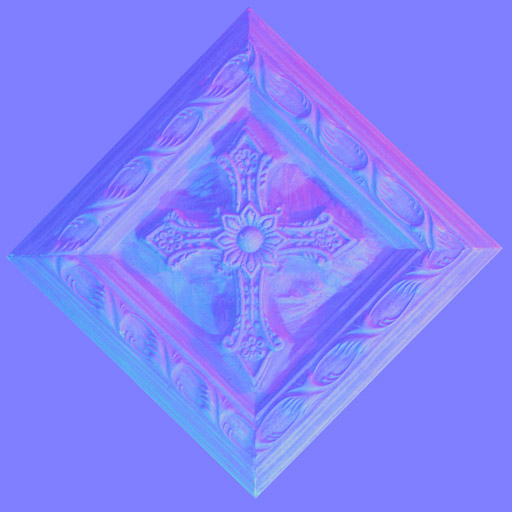
Normal Map:
after steps 1 - 8
|
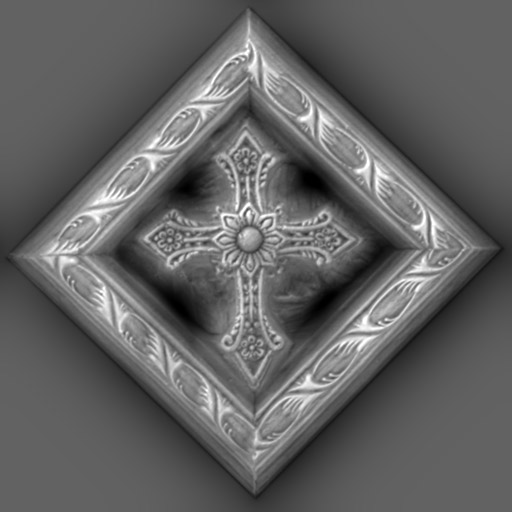
Displacement Map:
from CrazyBump
|
 |
 |
 |
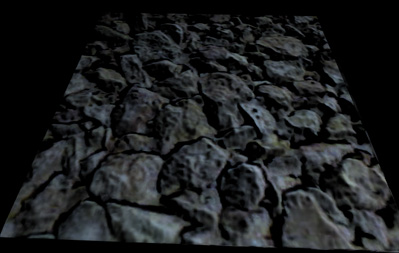
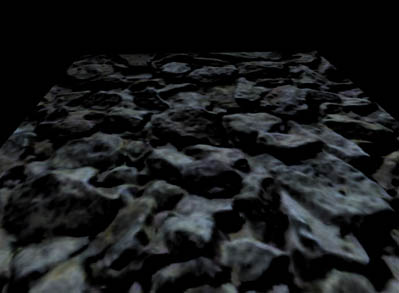
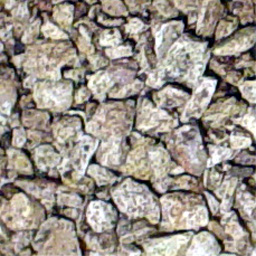
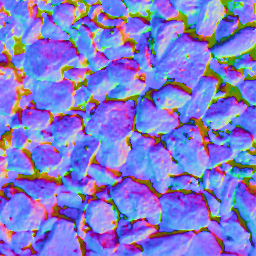
Subject:
some rocks
|
Normal Map:
after steps 1 - 8
|
Displacement Map:
from CrazyBump
|
3D Renderings:
These renderings depict flat surfaces of two polys each.
The appearance of depth is due entirely created by photo-captured normal and displacement maps.
Direct questions and comments to richardryanclark@gmail.com